
 Request Appointment
  Find A Location
  Pay My Bill
 By Stephanie Bingham, MS, LAT, ATC
Ice is a great form of cold therapy to help with the symptoms that can come from bumps and bruises. Applying ice to an injury can help to decrease pain and inflammation in a localized area, helping to speed recovery.
Ice packs are a great way to apply ice as they are flexible, will fit the injured area, and are re-usable.
Even better, you can make your own gel-like ice pack at home.
Materials needed
• 1-gallon or quart-sized zippered plastic freezer bags
• 1 cup of rubbing alcohol (we used 70 percent isopropyl alcohol)
• 2 cups of water
Instructions
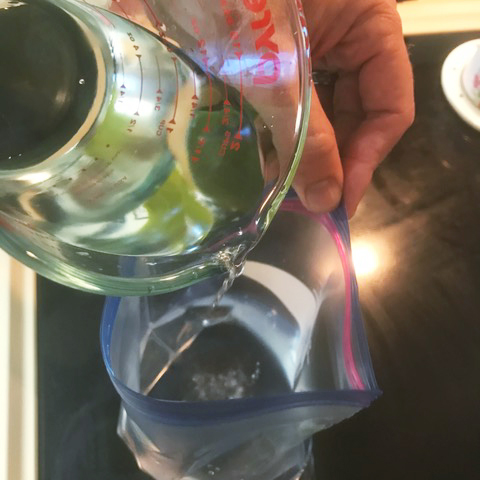
Step 1. Fill the freezer bag with 2 cups of water and 1 cup of rubbing alcohol
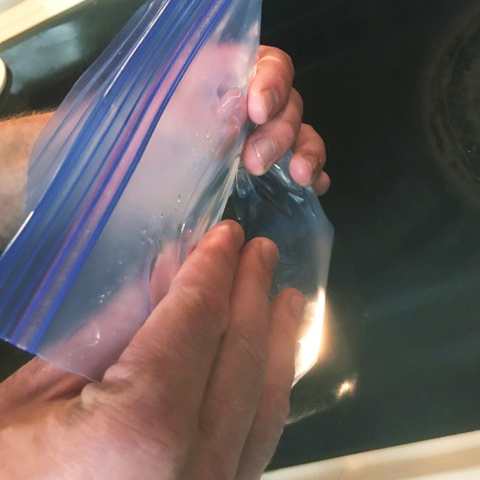
Step 2. Squeeze as much air as possible out of the freezer bag before zipping and sealing
Hint: Placing your bag into a second freezer bag will help contain any leaks
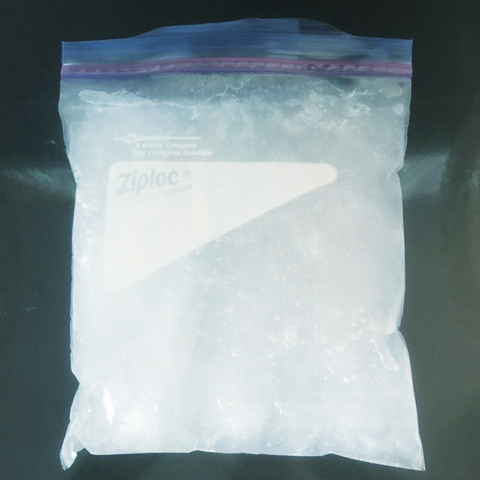
Step 3. Place the bag in the freezer for at least two hours before removing for use
Step 4. After two hours, you should find a cold, slush-filled ice bag ready for use (and re-use!)
Never place the bag directly on skin when applying it to an injured area. To avoid burns, place a towel between the bag and skin and for no longer than 20 minutes at a time. Allowing one hour between ice treatments is a safe rule of thumb.
If your symptoms do not improve, make sure to seek advice from a physician.
